Wireless Projector (Solstice Collaboration System)
Please Note
The information on this page is currently only valid for the following rooms:
- HCI J 498
Quick Start Guide
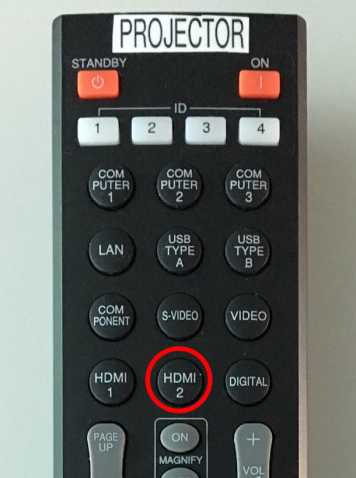
Selecting the Solstice Collaboration System
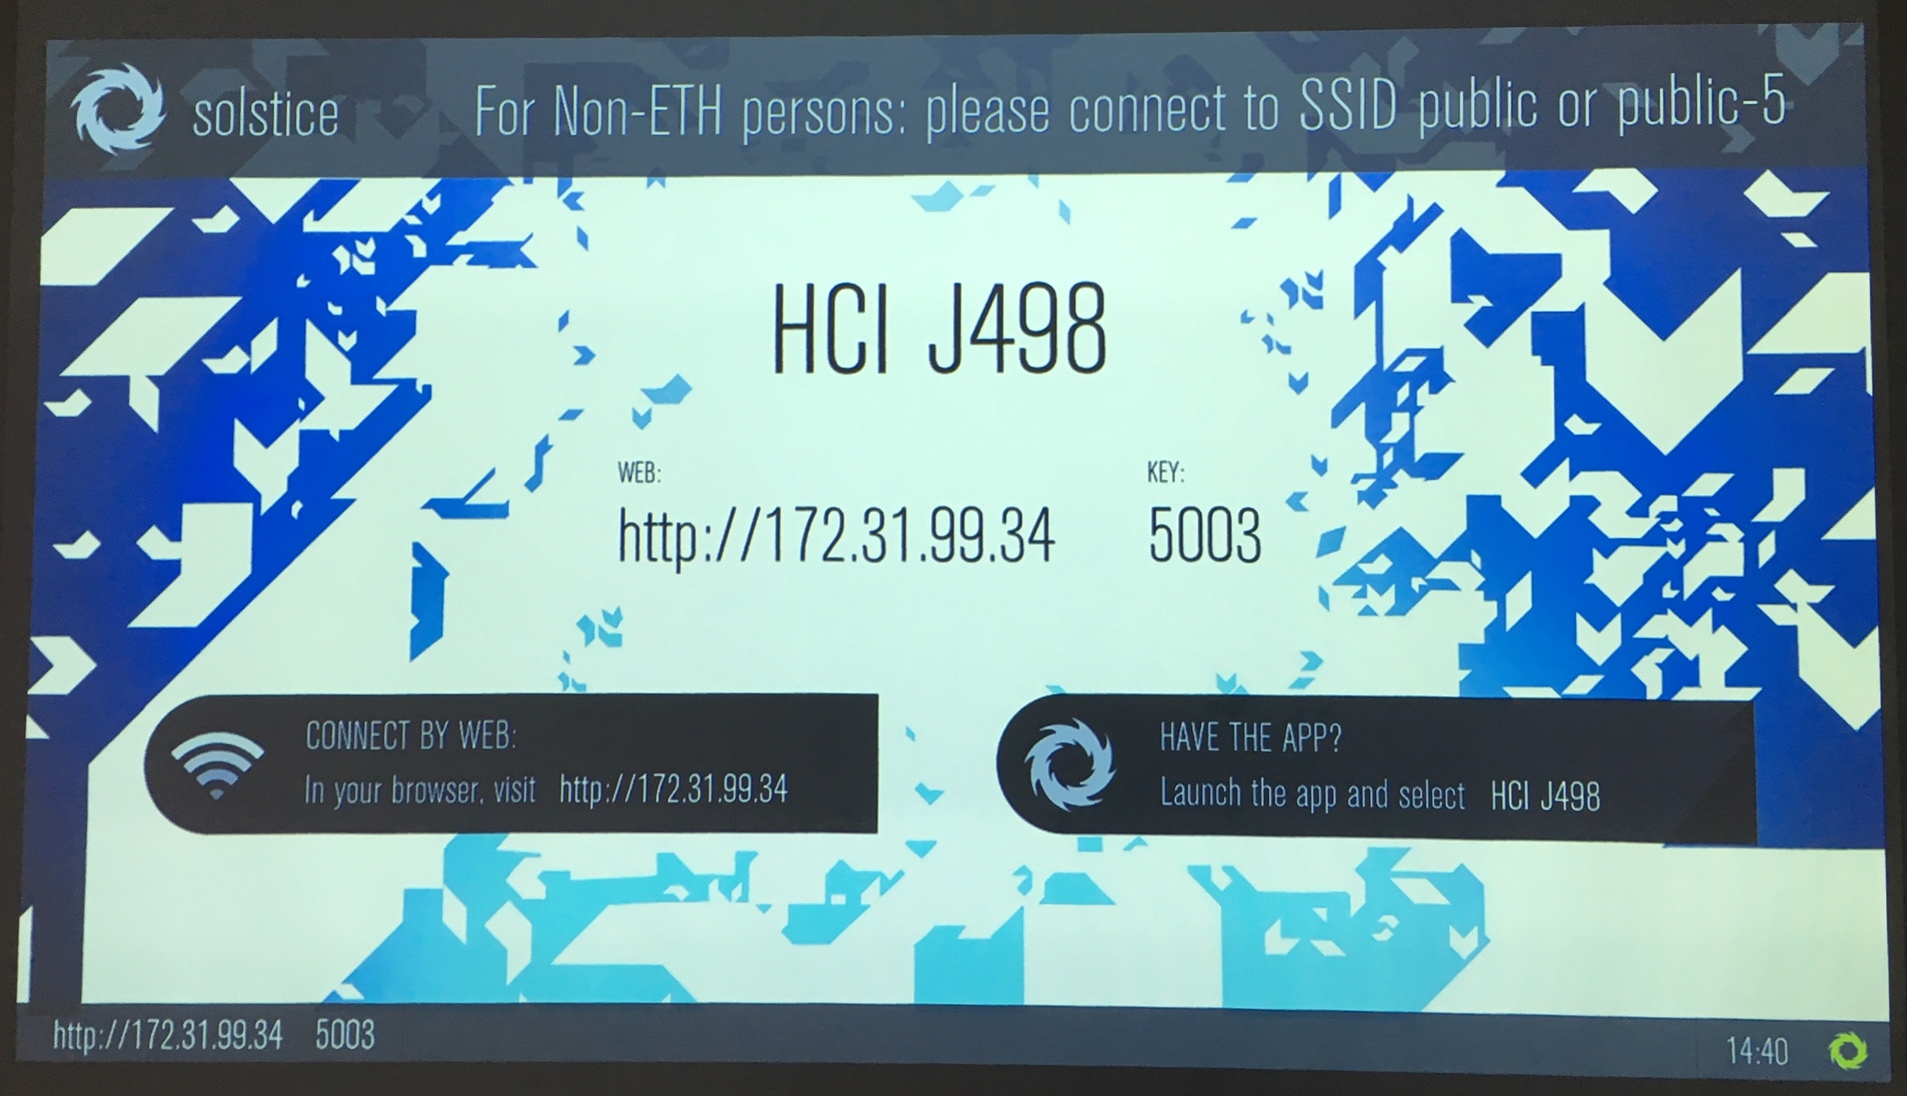
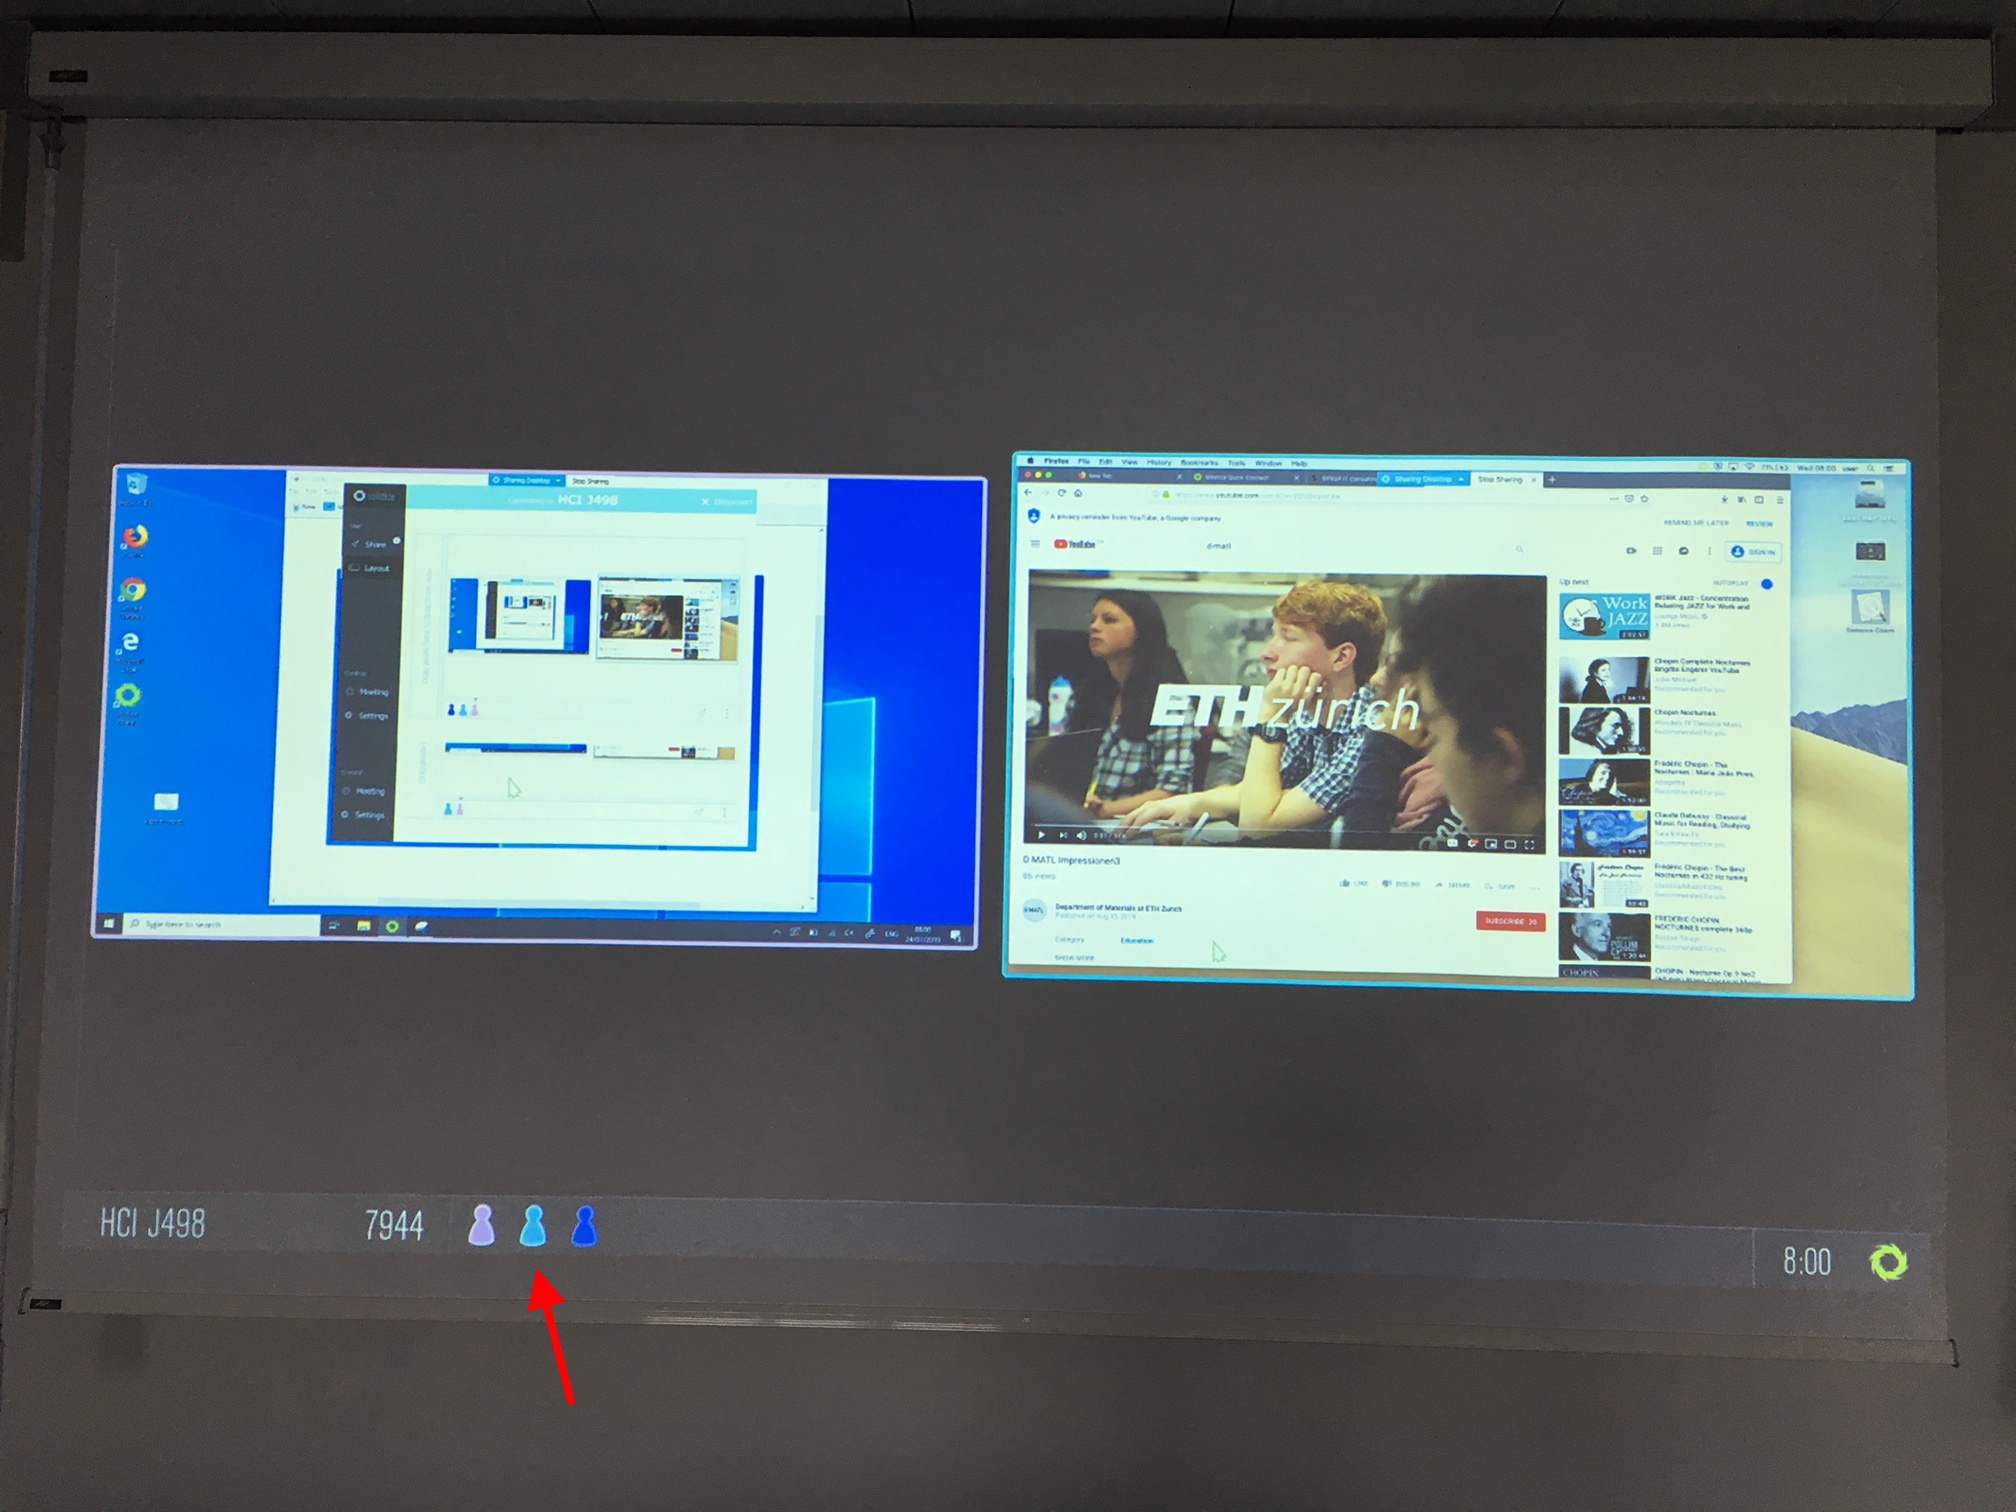
The Solstice Display (Figure 2) presents all necessary information to connect to the Solstice Collaboration System:
- the url for downloading the apps for Android, iOS, macOS and Windows (the IP number is variable),
- the display name HCI J498,
- the Key 5003 of the display (the key changes frequently),
- the information for non-ETH persons to use SSID public or public-5 to connect to the display.
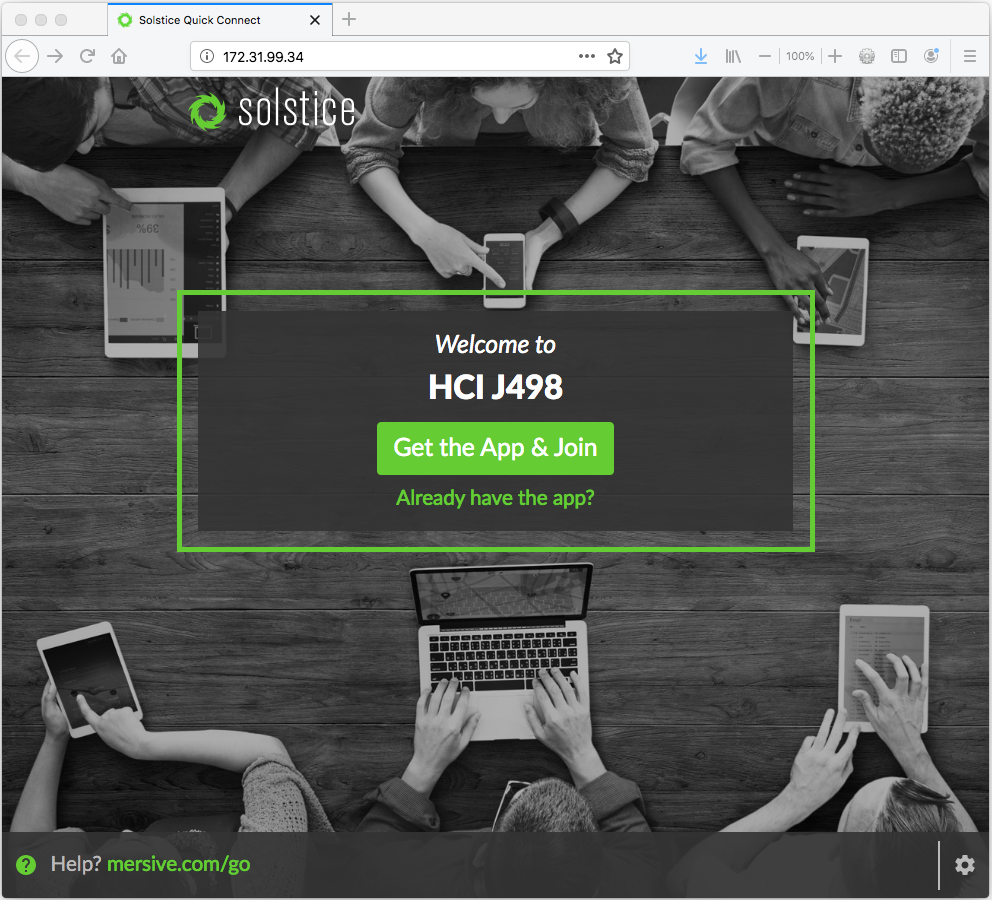
When opening the website given on the Solstice Display a button for downloading the Solstice App is presented. By clicking on "Get the App & Join" the client is either directly downloaded (macOS, Windows) or the Goolge Play Store or Apple App Store is opened.
The projector can also be connected without the Solstice App by using AirPlay or Miracast (HDMI over WiFi).
Solstice App
The Solstice App can also directly be downloaded in advance from the Mersive Technology Inc. website:
- external page Android (opens Google Play Store)
- external page iOS (opens Apple App Store)
- external page macOS (direct download)
- external page Windows (direct download)
There is no need for administrator privileges to use the Solstice App.
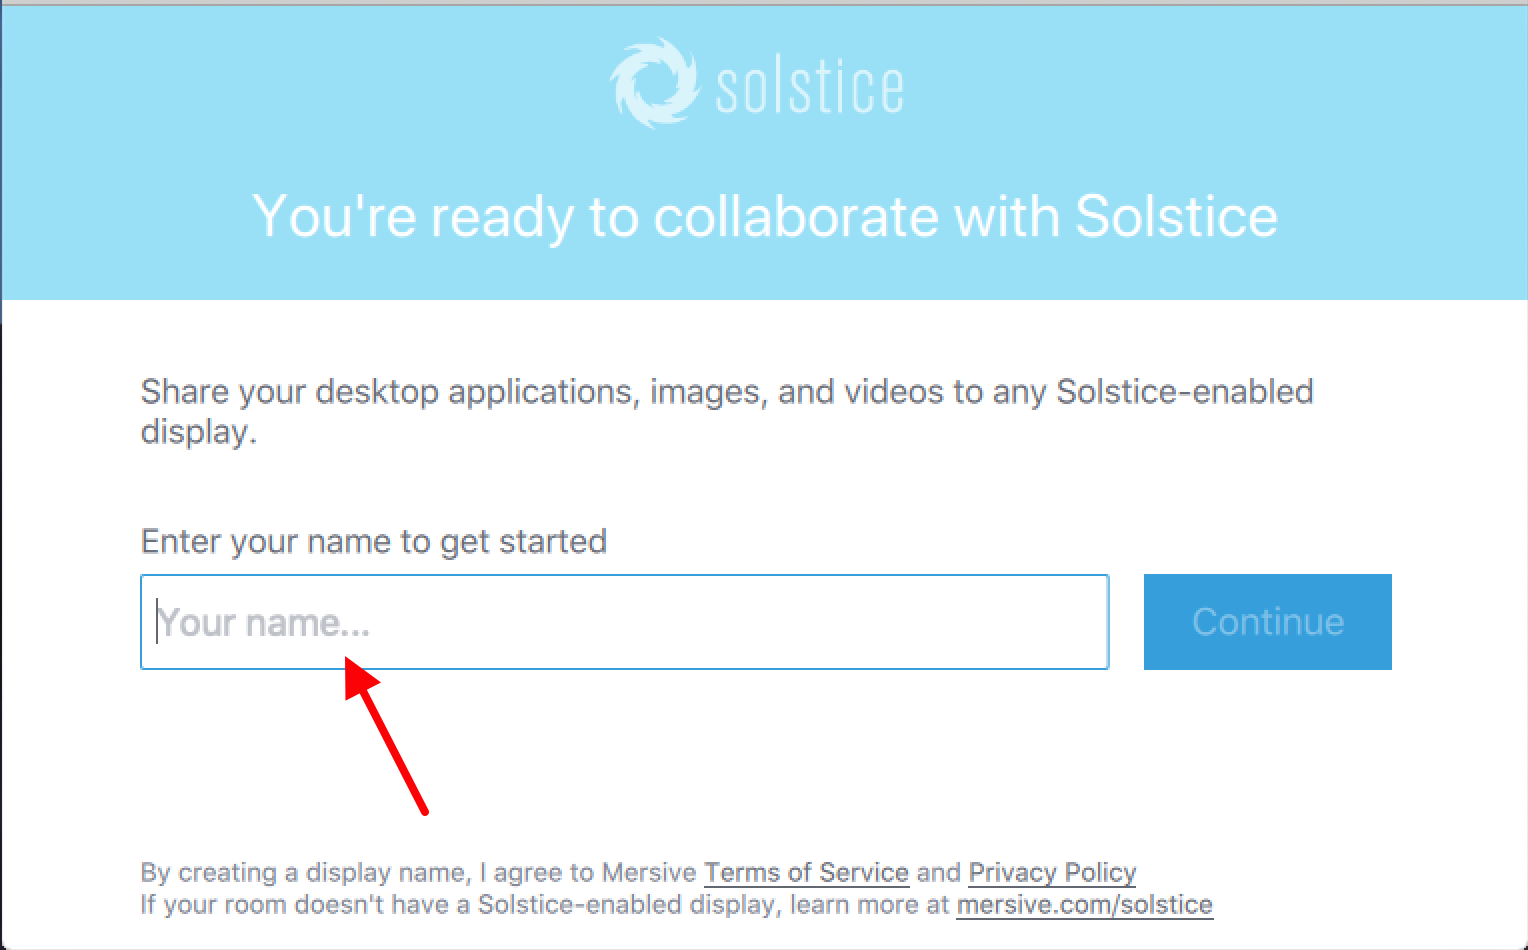
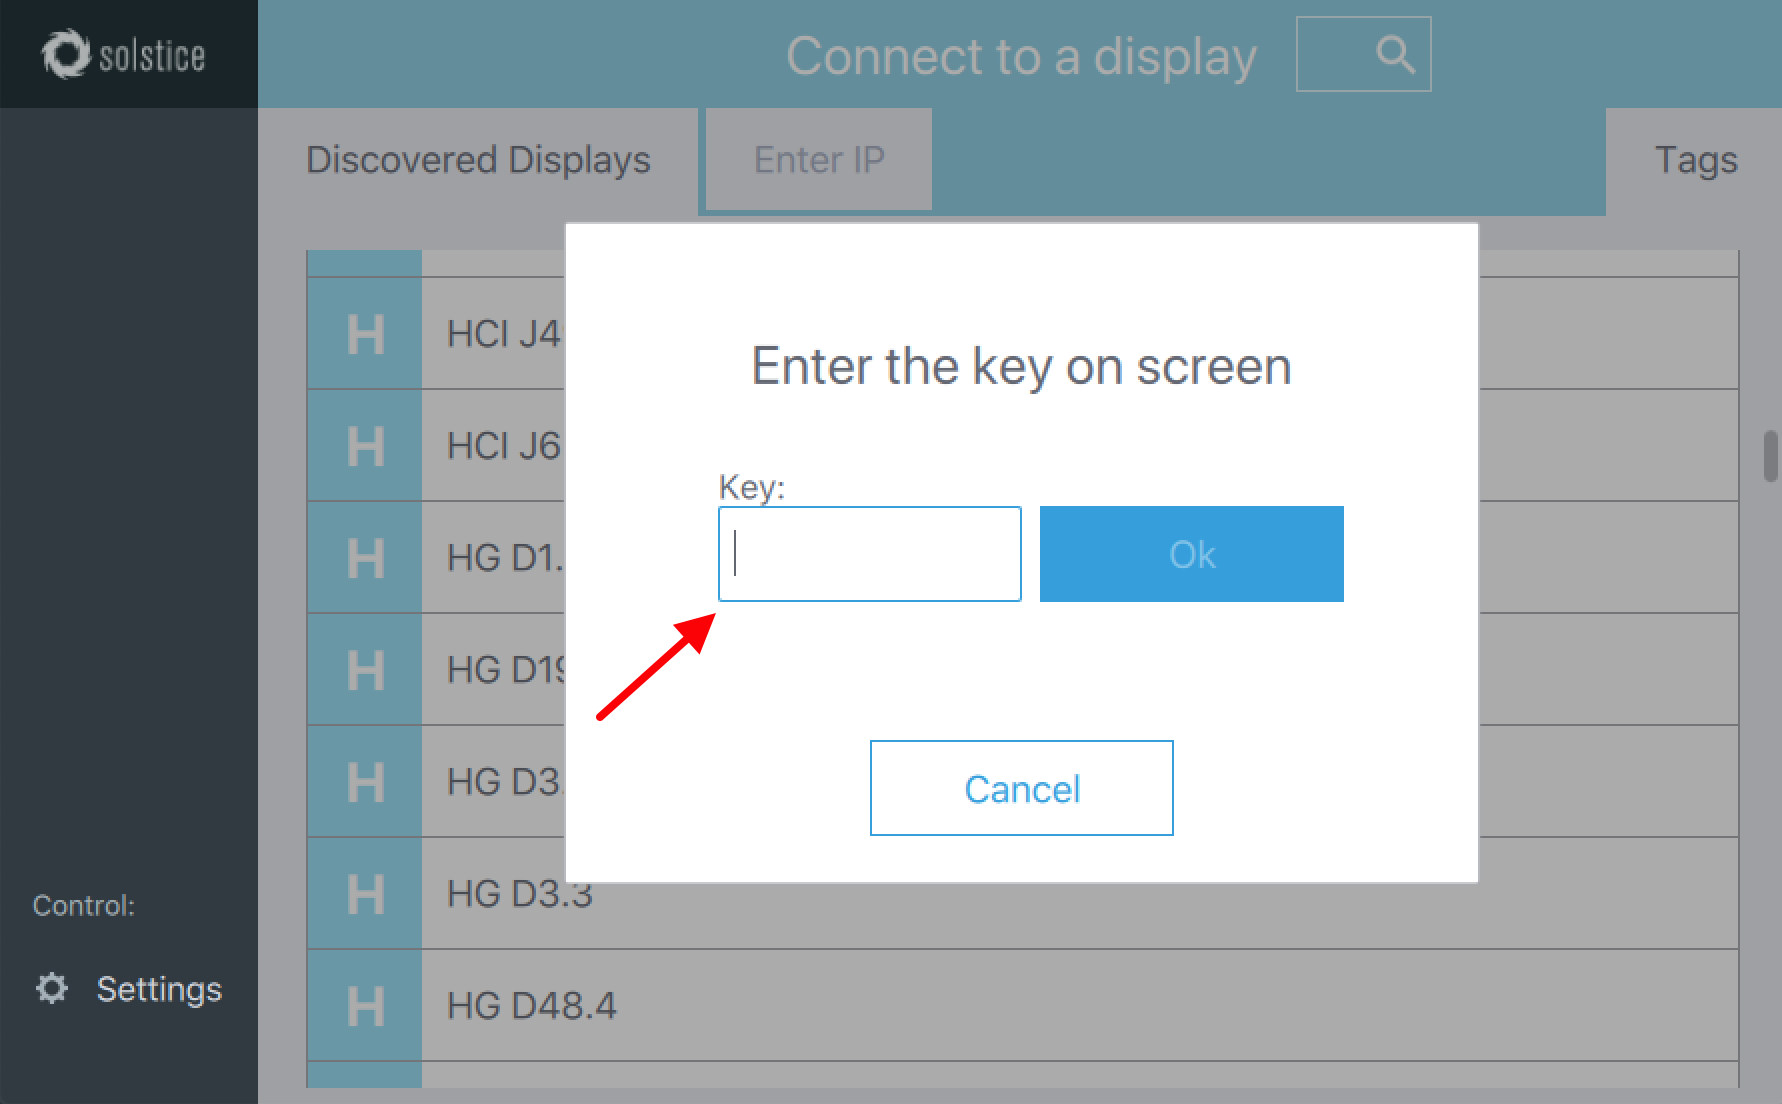
When the App is started the first time, it asks for your name which will be shown in the collaboration session. To connect to the projector, choose HCI J498 from the provided list and enter the key (Figure 4) shown on the Solstice Display (Figure 2).
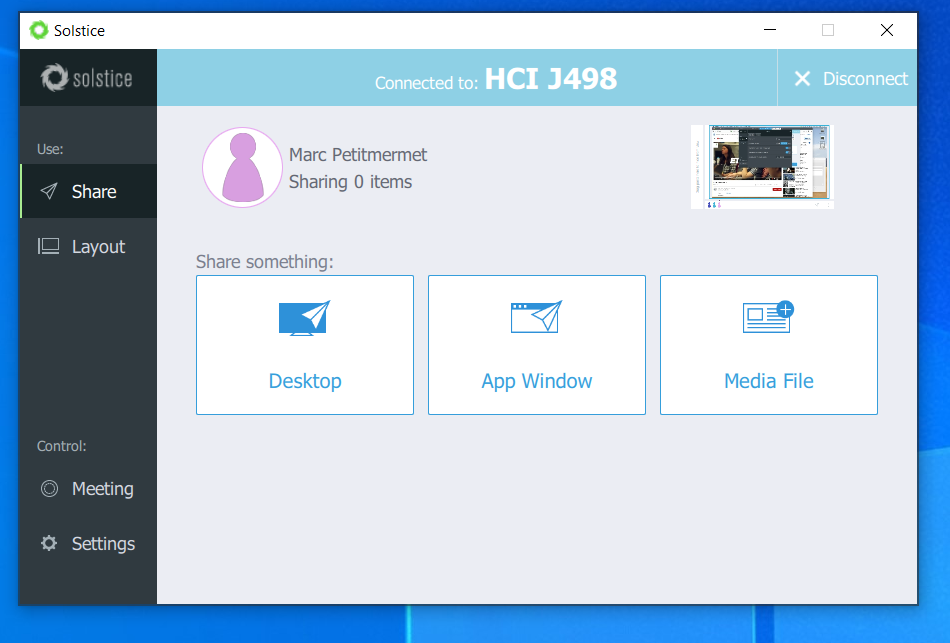
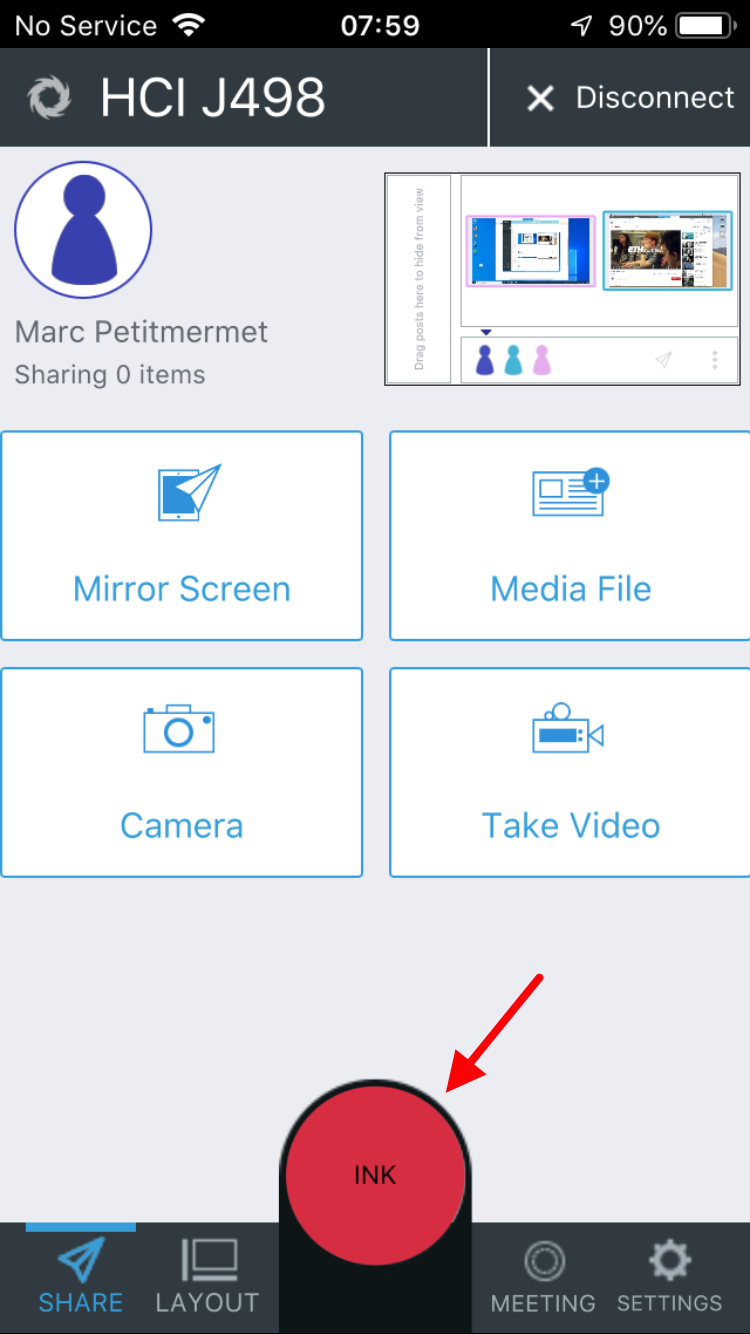
The Solstice App looks and functions similiar on all operating system; there is some rearrangement on smartphones because of lack of space (Figure 5).
You can now either share your:
- Desktop (macOS, Windows) / Mirror Screeen (iOS, Android)
- App Window (macOS, Windows)
- Media Files (all operationg systems)
- Camera or Video (iOS, Android)
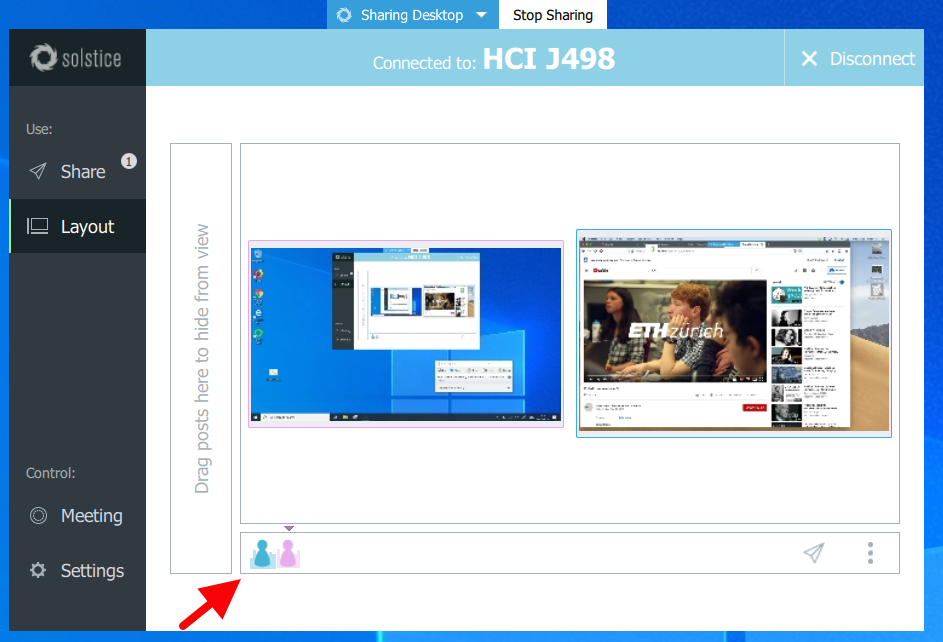
It is possible that multiple devices can connect – even multiple times – to the Solstice Collaboration System at the same time. This is shown by the paricipiant icons and multiple windows in the Layout screen of the Solistce App and the Solstice Display.
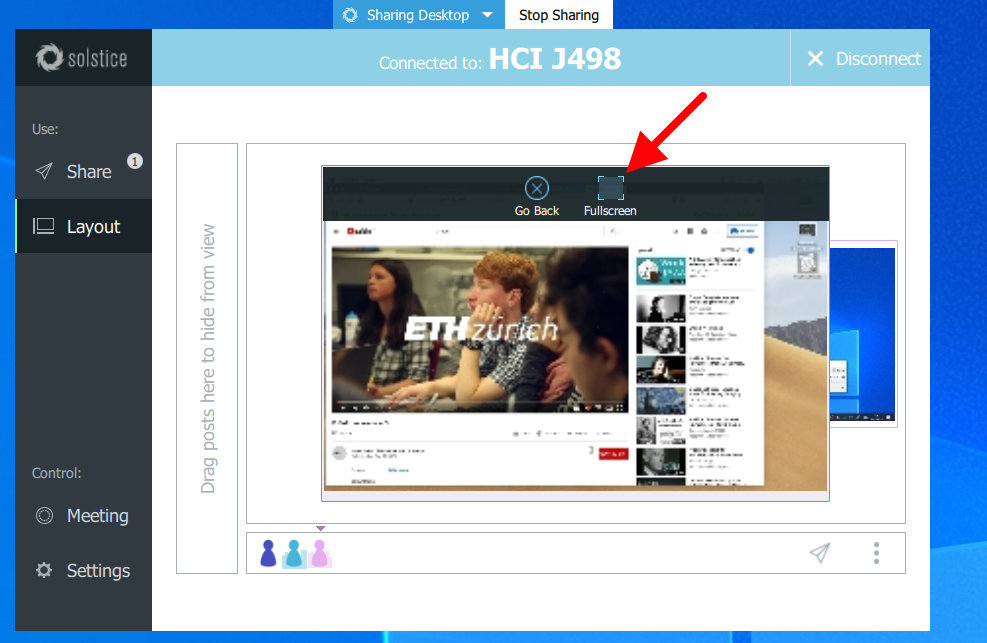
If you want to project a certain desktop in full screen, select it in the layout screen of the Solstice App and click on the Fullscreen button (Figure 6).
Using Audio through the Speakers
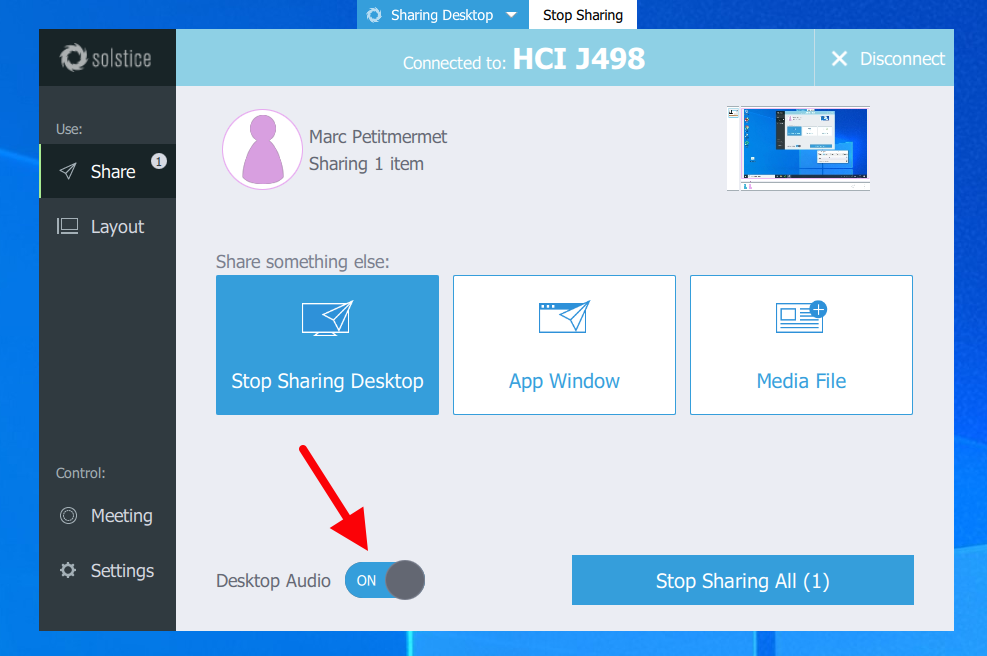
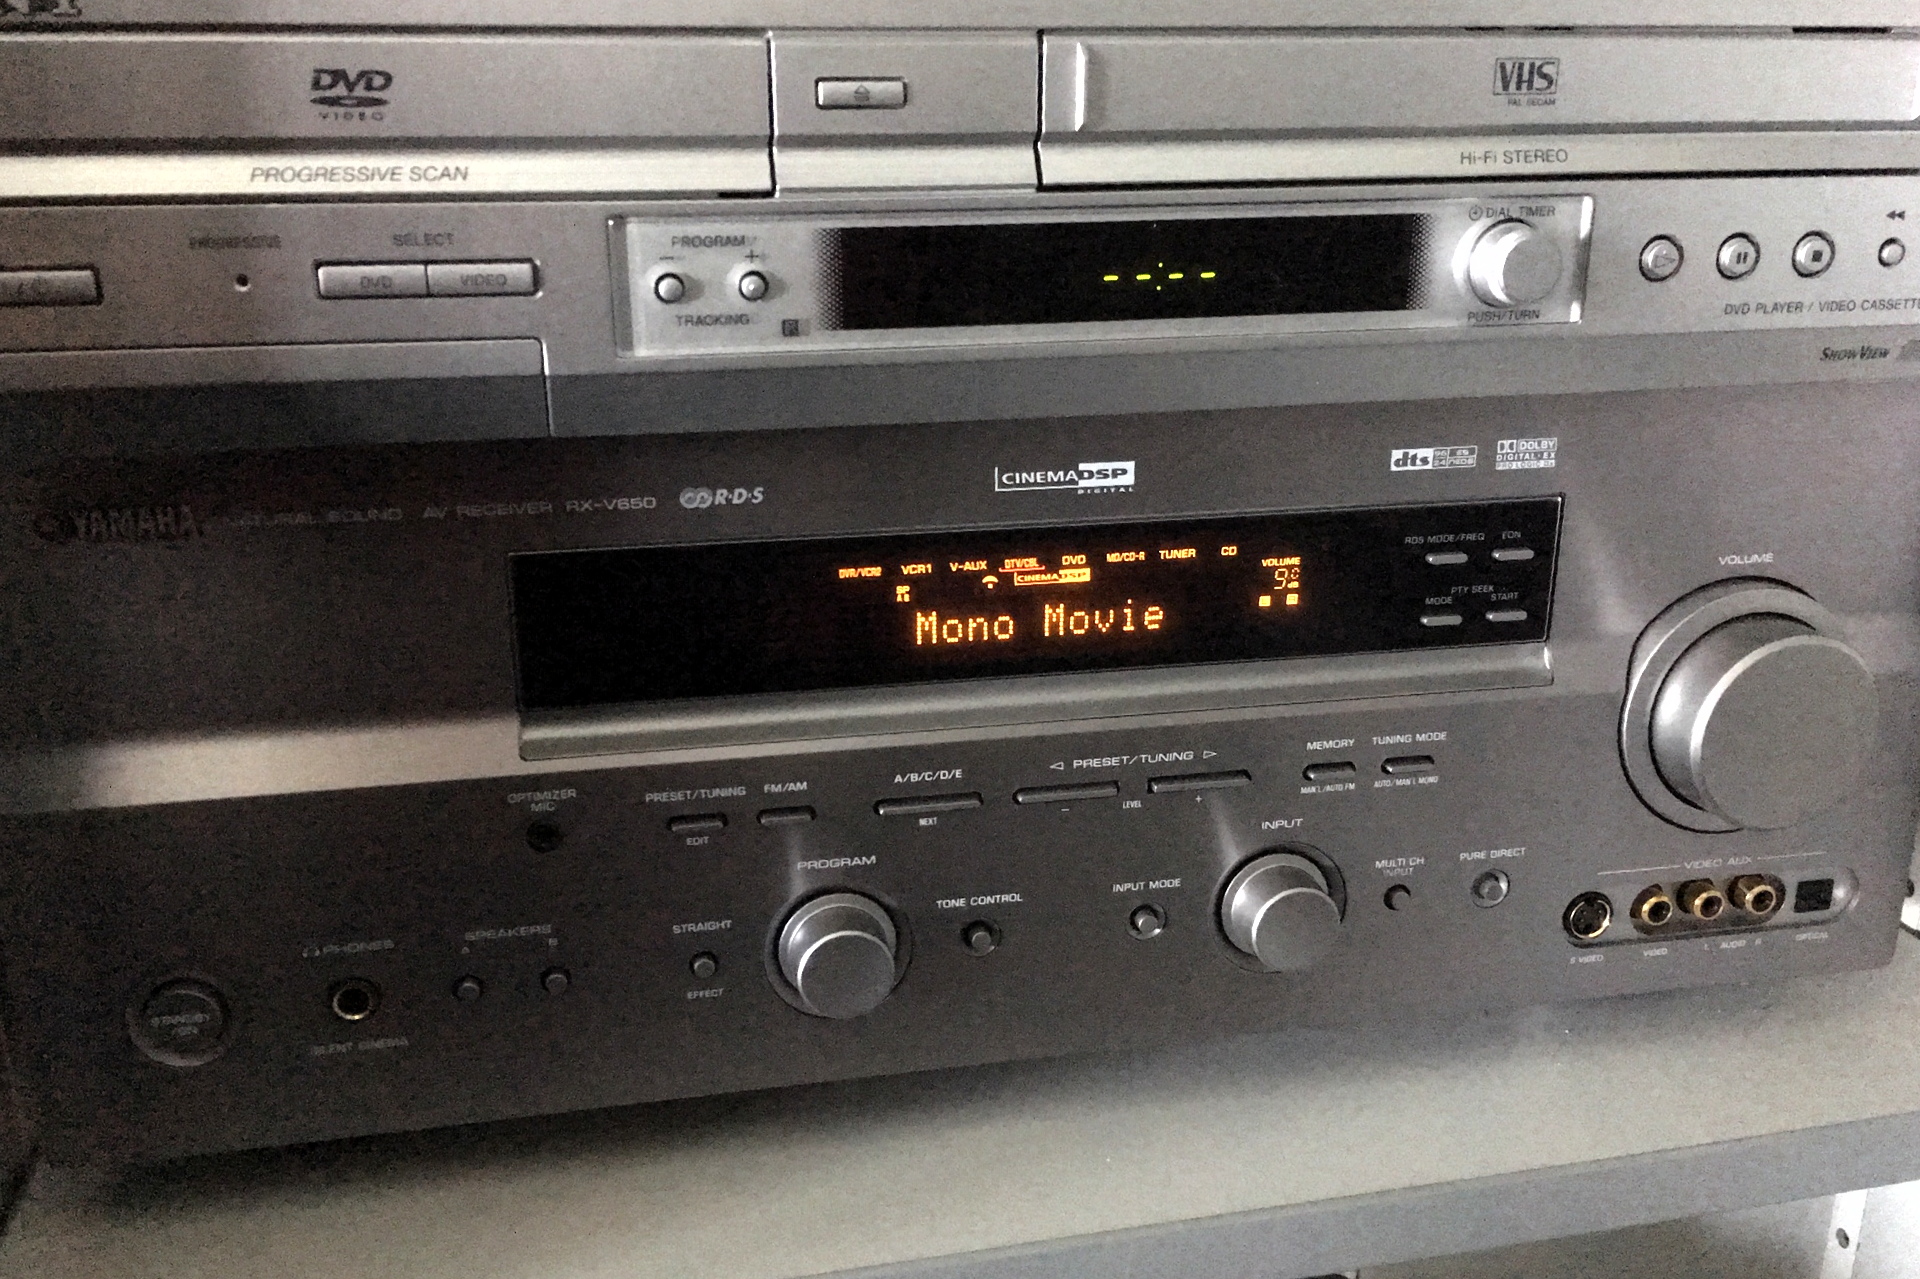
When sharing content it is possible to enable or disable audio (Figure 7). Please do not forget to power on the tuner in the media cabinet. The input source should be DTV/CBL.
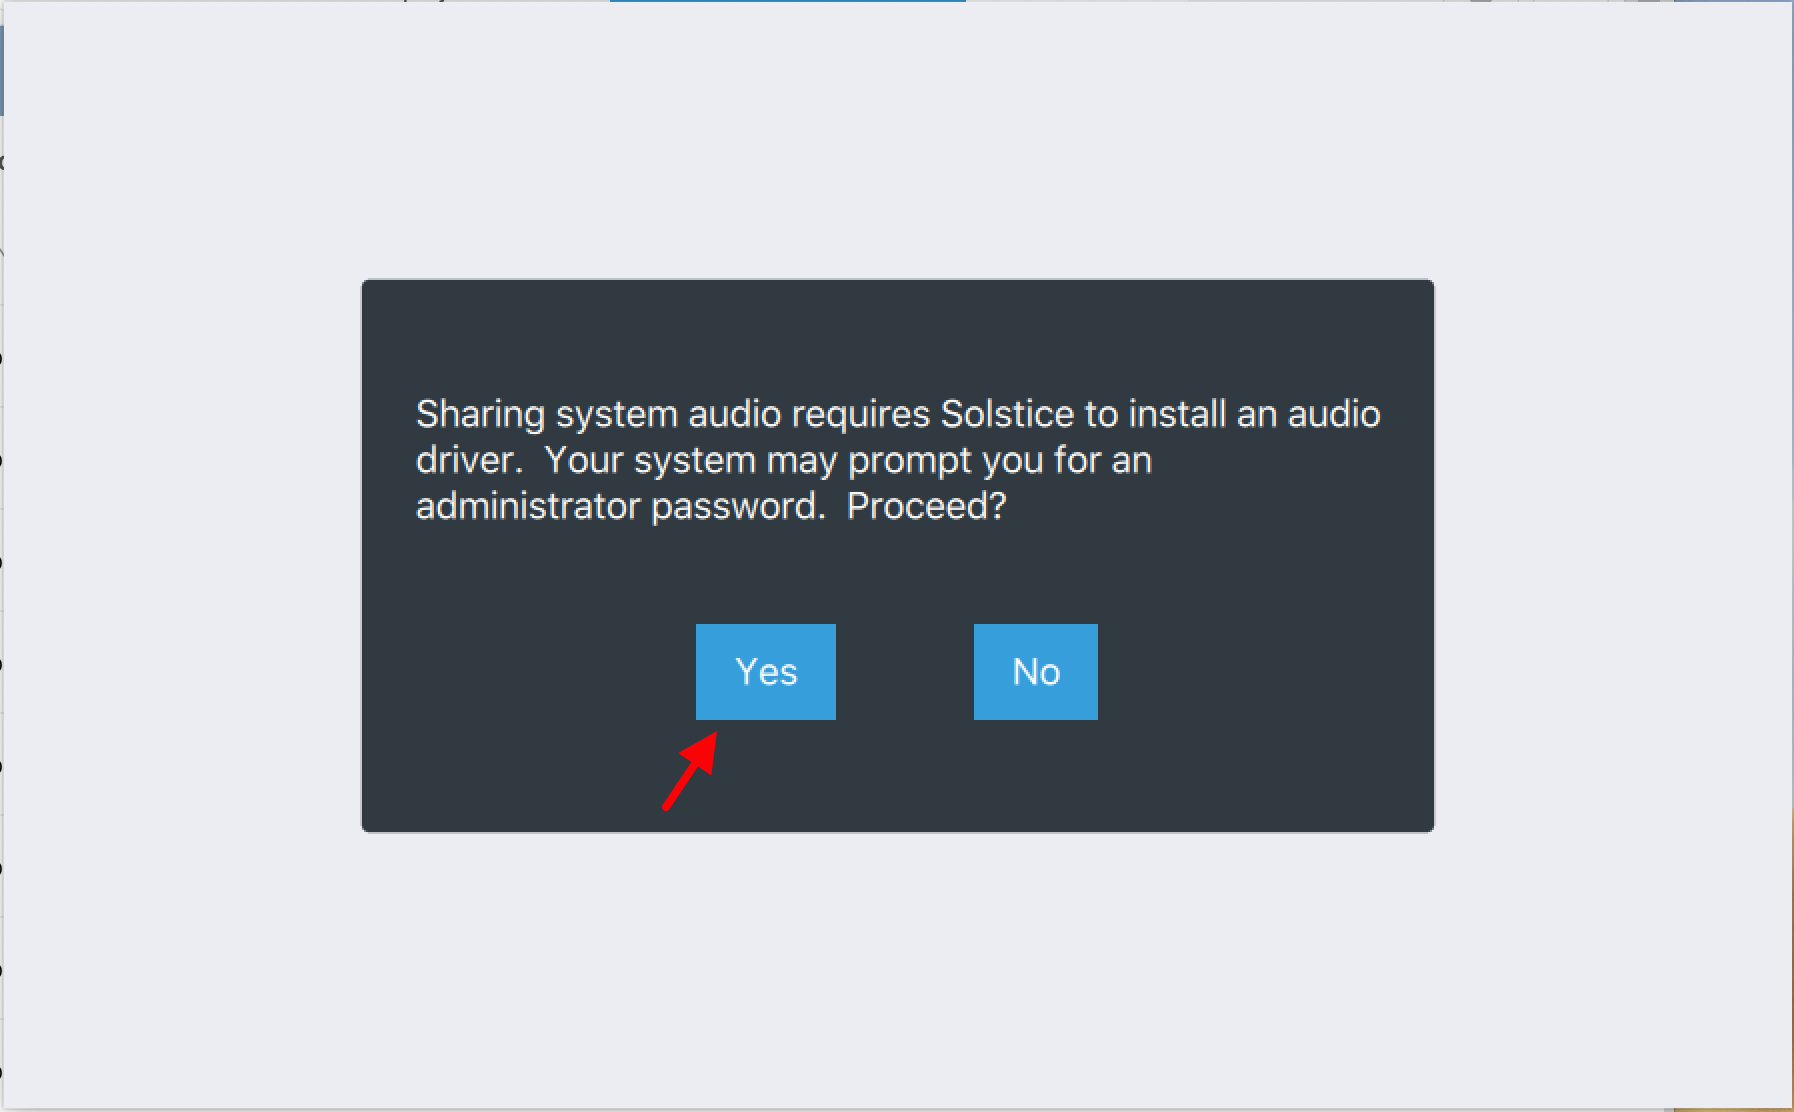
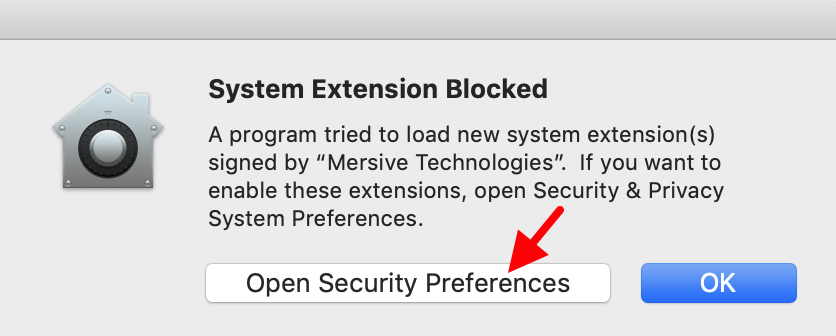
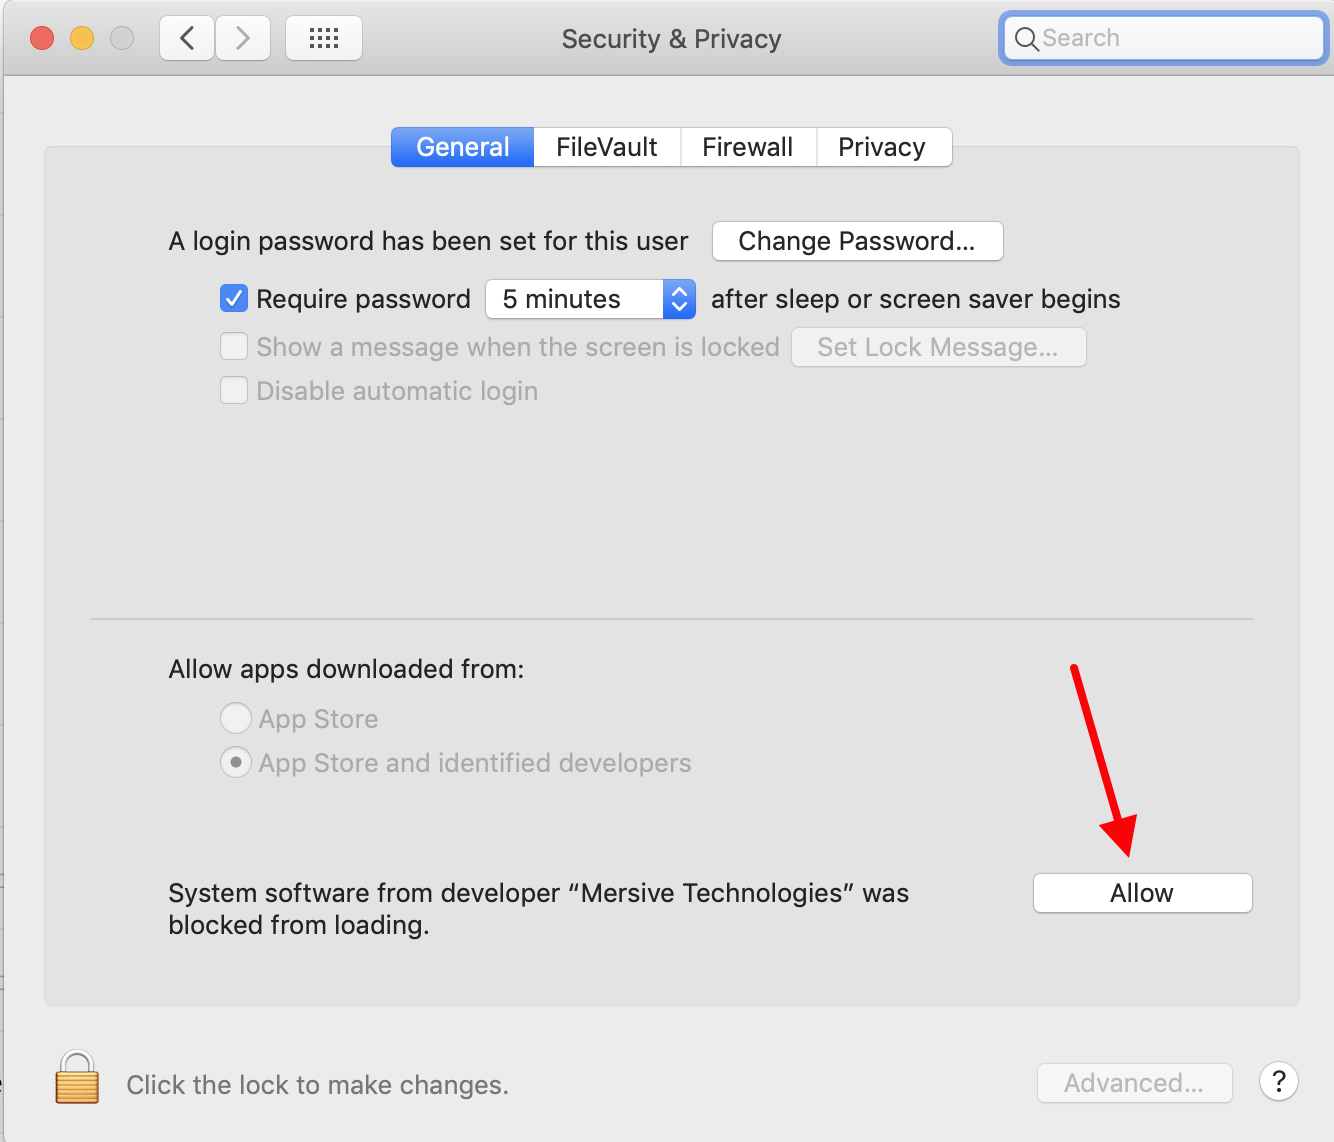
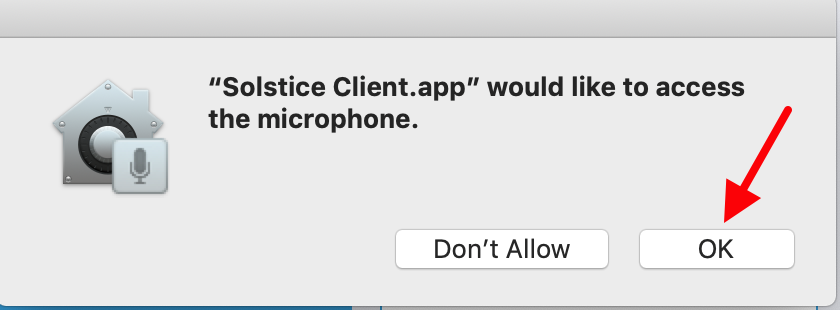
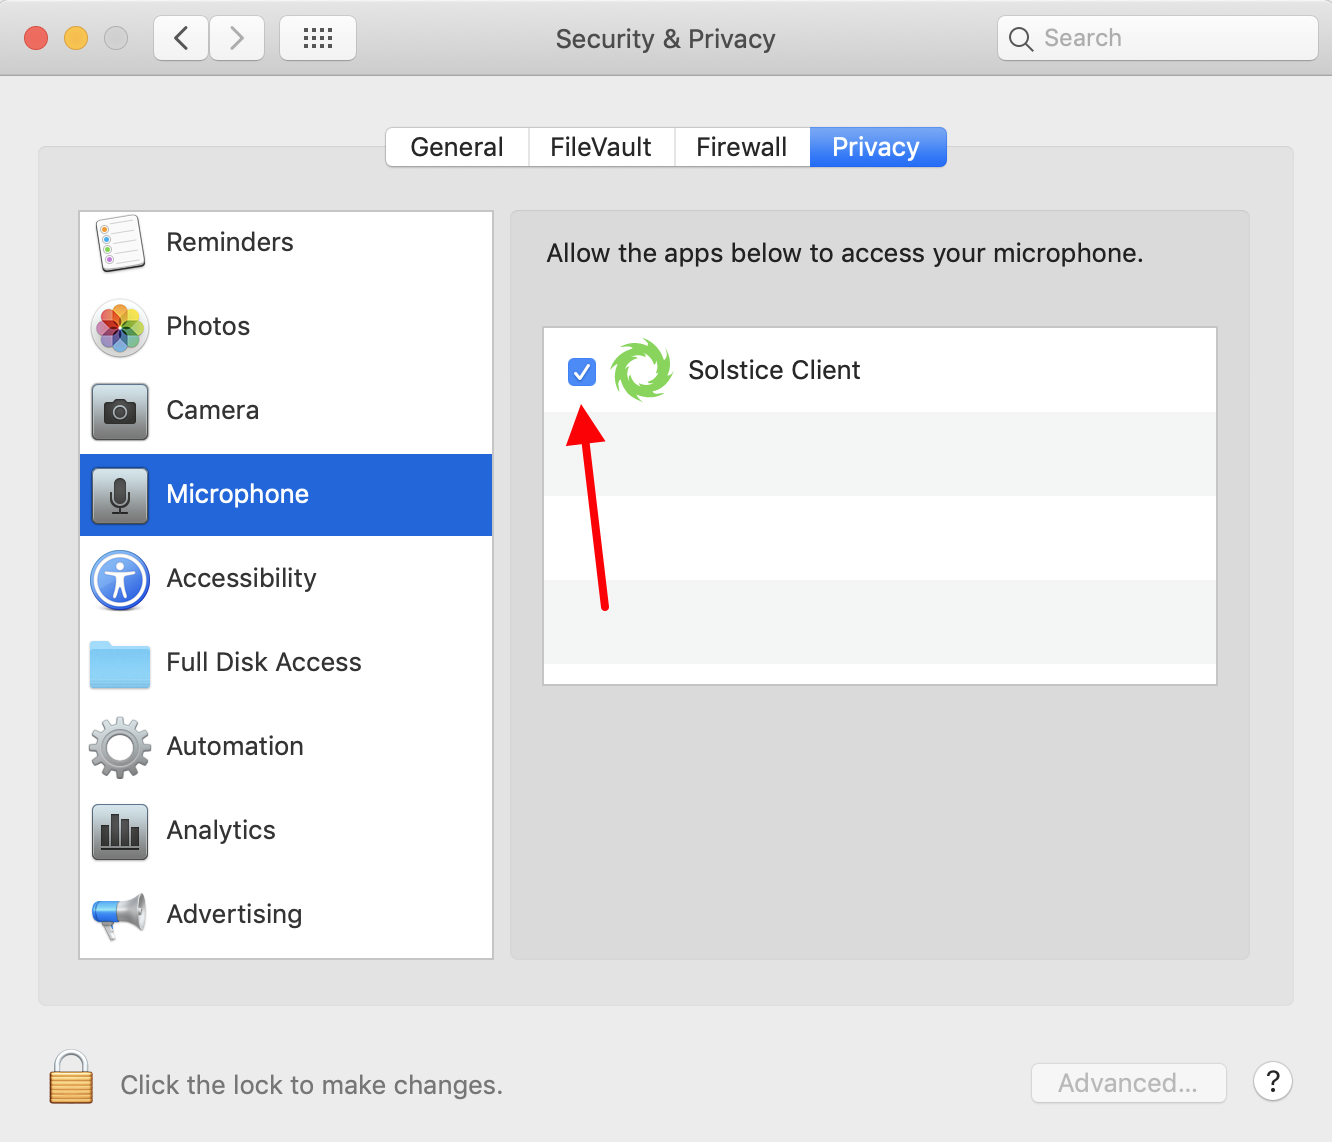
On macOS sharing system audio requires the Solstice App to install an audio driver (Figure 8); this procedure requires administrator privileges. During the installation of the driver the operating system will ask you to allow the loading of system software from the developer "Mersive Technologies" (the audio driver) and when toggling the audio setting in the Solstice App it asks to access the microphone. Please allow both settings.
Solstice Ink
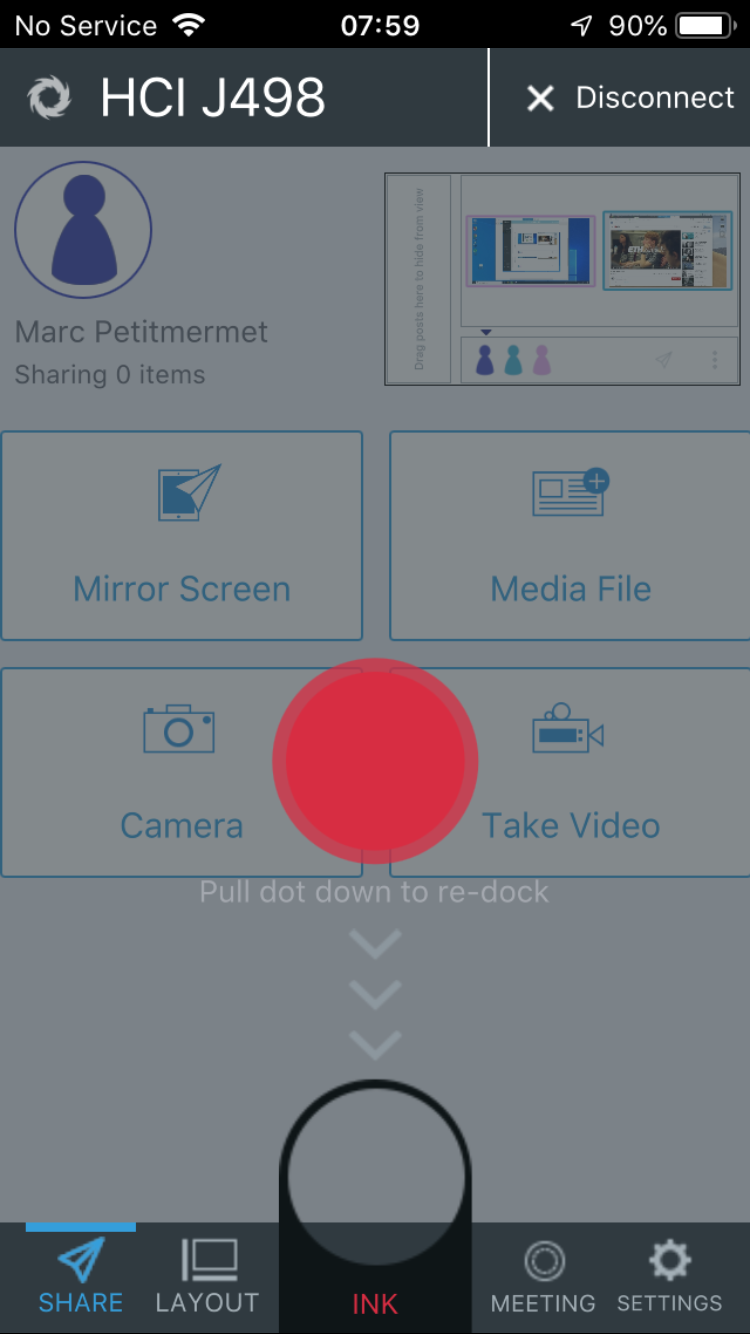
Availble on smartphones only is the Solstice Ink feature (Figure 9). This allows you to highlight and temporarily mark up content on the Solstice display from anywhere in the room by simply pointing and drawing with your smartphone. It has three modes of use:
- Pointer: Press and hold the Ink button or drag the button to the center of the screen to use your phone as a pointer.
- Pulse: Tap the Ink button to pulse the pointer.
- Temporary markup: Drag the Ink button to the center of the screen, then press and hold the button to draw.
